3 Dryland Exercises to Strengthen Your Core and Swim Faster
Try this simple core strengthening routine
Published on July 30th, 2025
Body position in the water is perhaps the most foundational, important aspect of being able to swim fast and efficiently. It can be challenging to develop the core strength needed to achieve the ideal body position, but these three core progression exercise can help.
Complete three rounds of these three exercises twice a week. For static exercises like the plank, your goal should be to hold the position for one minute with perfect form. If you’re working on a dynamic movement, aim for 10 reps or 10 reps on each side.
Plank
The basic plank is a great place to start to in helping you achieve a tighter streamline. Working on it on land helps you make it second nature in the water.
When completing a plank, think about mimicking the position you want to mimic in the water. Often, you’ll see people planking with their head up or their back arched; this is not what you should be looking to mimic in the water.
Instead, think about your streamline position. Do you want your head up looking through your hands and your back with a pinch causing pain? Or do you want your head forward or looking down at the line on the bottom of the pool and your tailbone tucked? The latter is going to be a lot more dynamic as you’re trying to move through the water.
Channel that ideal position during your plank by starting with that tucked tailbone position and squeezing your glutes. Drive your shoulder blades together slightly and keep your head looking down, about six inches in front of your hands. This position works better in the water than having your head up and back arched.
Dead Bug
Bring that tucked tail bone position into the second exercise, where we’ll add some movement to your core training to help mimic the arm and leg movements during swimming.
Start by lying on your back on the floor with arms and legs as straight as you can make them pointing straight up into the sky. Flex your feet and push your low back firmly into the ground. Your low back should never come off the ground—avoid that low back arch.
Then, connect the movement of opposite arms and legs—while keeping the low back on the floor, drop the right arm and the left leg down until both are few inches above the floor and parallel, then bring them back up to the start position. Then lower the opposite leg and arm into that same parallel-to-the-floor position and then return to the start point.
Control the movement and keep that low back in contact with the ground while keeping the arms and legs straight.
If you’re unable to complete this exercise with your legs straight, try bending the knees while still sending the arm and leg out as far as you can each time. The big key is maintaining that tucked tailbone position you practiced during the plank exercise.
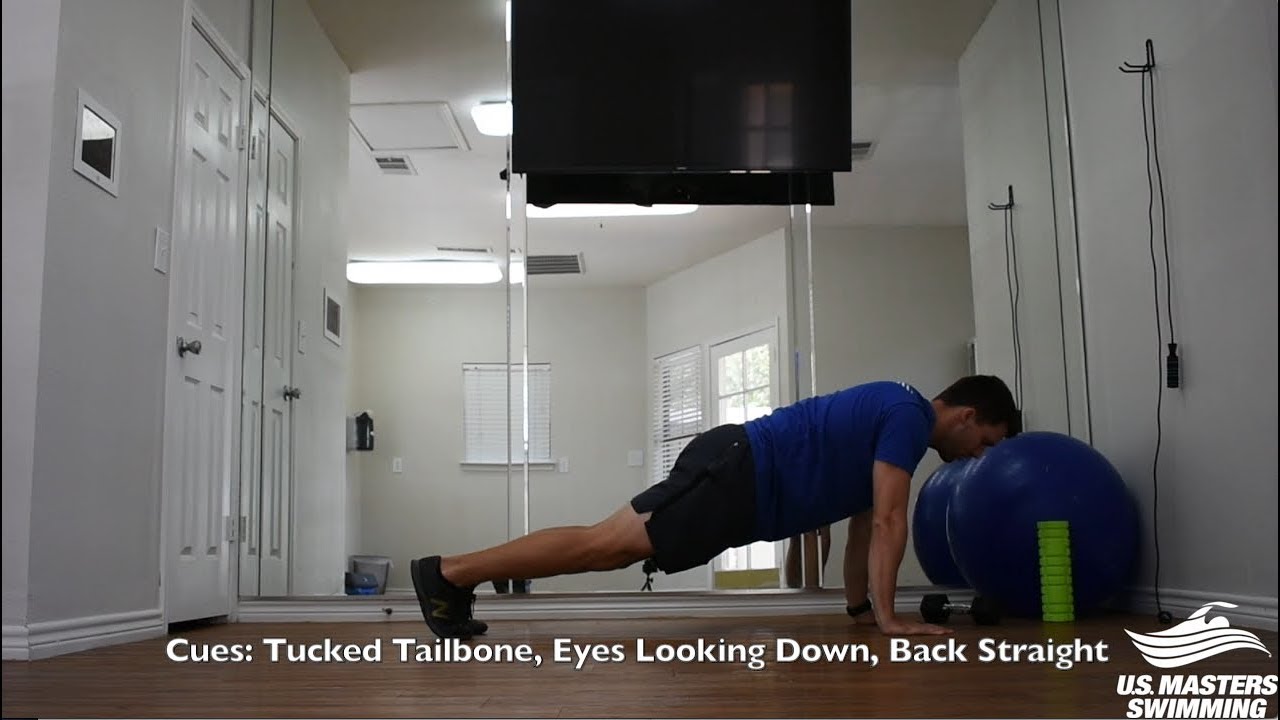
Stability-Ball Plank
Adding a stability ball can really challenge you to maintain body positioning and activate your core a bit more as you're trying to maintain a plank position on the ball. But make sure you master the first two variations before moving on to the stability ball plank.
To complete this exercise, get into the basic plank position but elevate your elbows on a large stability ball. Using the stability ball adds just enough of an unstable surface to offer a deeper contraction in your core and highlight your transverse abdominals as well.
If you want to take this exercise a step further, add some movement by driving the arms away from your body and then back in. This initiate lat engagement but be sure to focus on keeping your hips still throughout the movement.
Start with the first two variations, master those, and then progress to the third.